
As your Rust programs get larger, you’ll need better ways to organize related data.
That’s where structs come in.
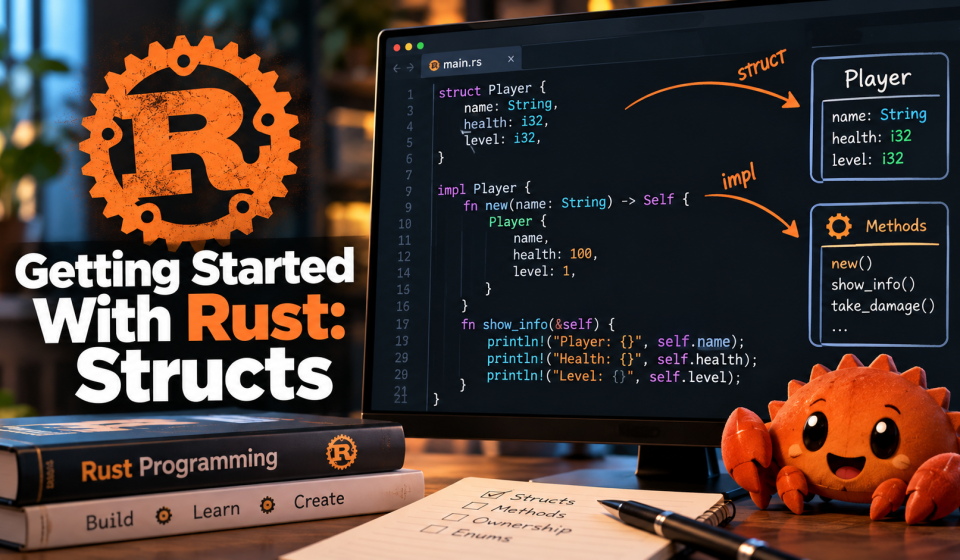
A struct lets you group multiple pieces of related data together into your own custom type.
Creating a Struct
Let’s say we’re building a simple game and need to keep track of a player.
We could create separate variables:
let name = "Player One";
let health = 100;
let level = 1;
That works, but these values all belong to the same player.
Instead, we can create a struct:
struct Player {
    name: String,
    health: i32,
    level: i32,
}
We’ve now created a new type called Player.
It contains three fields:
namehealthlevel
Each field also has its own type.
Creating a Struct Instance
Now we can create an actual player:
fn main() {
    let player = Player {
        name: String::from("Player One"),
        health: 100,
        level: 1,
    };

    println!("Player: {}", player.name);
    println!("Health: {}", player.health);
}
Fields are accessed using a dot:
player.name
player.health
player.level
This makes related information much easier to keep organized.
Changing Struct Values
Just like normal Rust variables, structs are immutable by default.
If we want to change a player’s health, the struct needs to be mutable:
fn main() {
    let mut player = Player {
        name: String::from("Player One"),
        health: 100,
        level: 1,
    };

    player.health = 75;

    println!("Health: {}", player.health);
}
Because we used:
let mut playerwe’re allowed to modify its fields.
Passing Structs to Functions
Structs can also be passed to functions.
For example:
fn show_player(player: &Player) {
    println!("Name: {}", player.name);
    println!("Level: {}", player.level);
    println!("Health: {}", player.health);
}
Then:
fn main() {
    let player = Player {
        name: String::from("Player One"),
        health: 100,
        level: 1,
    };

    show_player(&player);
}
Notice that we’re passing:
&playerinstead of:
playerWe’re borrowing the player rather than giving ownership of it to the function.
This lets us continue using player afterward.
Adding Functions to a Struct
Rust also lets us define functions that belong to our struct using impl.
For example:
impl Player {
    fn show_info(&self) {
        println!("Player: {}", self.name);
        println!("Level: {}", self.level);
        println!("Health: {}", self.health);
    }
}
Now we can call:
player.show_info();Here’s the complete example:
struct Player {
    name: String,
    health: i32,
    level: i32,
}

impl Player {
    fn show_info(&self) {
        println!("Player: {}", self.name);
        println!("Level: {}", self.level);
        println!("Health: {}", self.health);
    }
}

fn main() {
    let player = Player {
        name: String::from("Player One"),
        health: 100,
        level: 1,
    };

    player.show_info();
}
The &self parameter gives the method access to the struct without taking ownership of it.
Methods That Change the Struct
What if we want a method that modifies our player?
We can use:
&mut selfFor example:
impl Player {
    fn take_damage(&mut self, damage: i32) {
        self.health -= damage;
    }
}
Then:
fn main() {
    let mut player = Player {
        name: String::from("Player One"),
        health: 100,
        level: 1,
    };

    player.take_damage(25);

    println!("Health: {}", player.health);
}
Our player’s health is now:
75This is where structs start becoming especially useful.
Instead of having unrelated functions and variables scattered throughout your program, you can organize data and the functionality that works with that data together.
Creating a Constructor
Rust doesn’t have constructors exactly like languages such as C++ or C#, but it’s common to create a new function.
impl Player {
    fn new(name: String) -> Player {
        Player {
            name,
            health: 100,
            level: 1,
        }
    }
}
Now creating a player becomes much cleaner:
let player = Player::new(String::from("Player One"));Notice the :: instead of ..
That’s because new() belongs to the Player type rather than an existing instance of a player.
Putting everything together:
struct Player {
    name: String,
    health: i32,
    level: i32,
}

impl Player {
    fn new(name: String) -> Player {
        Player {
            name,
            health: 100,
            level: 1,
        }
    }

    fn take_damage(&mut self, damage: i32) {
        self.health -= damage;
    }

    fn show_info(&self) {
        println!("Player: {}", self.name);
        println!("Level: {}", self.level);
        println!("Health: {}", self.health);
    }
}

fn main() {
    let mut player = Player::new(String::from("Player One"));

    player.take_damage(25);

    player.show_info();
}
We’ve now created our own Player type with its own data and functionality.
Why Structs Matter
Structs are one of the building blocks you’ll use constantly in Rust.
They let you take related information like:
name
health
level
and turn it into something meaningful:
PlayerFrom there, you can add methods that control how that data behaves.
You’ll eventually use structs for everything from game characters and configuration settings to API responses, database records, and application state.
What’s Next?
Now that we can create our own types with structs, there’s another Rust feature that works extremely well alongside them:
Structs are great when something contains a collection of related values.
Enums are great when something can be one of several possible values.
And Rust takes enums quite a bit further than many other programming languages.
That’s what we’ll look at next.